Here are a few of my airplane Christmas gifts. Space shuttle repro switch guard in aluminum. The original in titanium costs $800. Also, an Adel nibbler for cutting inside holes in aluminum. Sweet!
Tuesday, December 25, 2012
Monday, December 24, 2012
Firewall Forward Progress
Austin is home for Christmas and we worked all day on the firewall forward and got tons done! Here's the battery installed with the battery maintainer pigtails installed.


Here's the heat muff with the orange scat tube going to the heater.

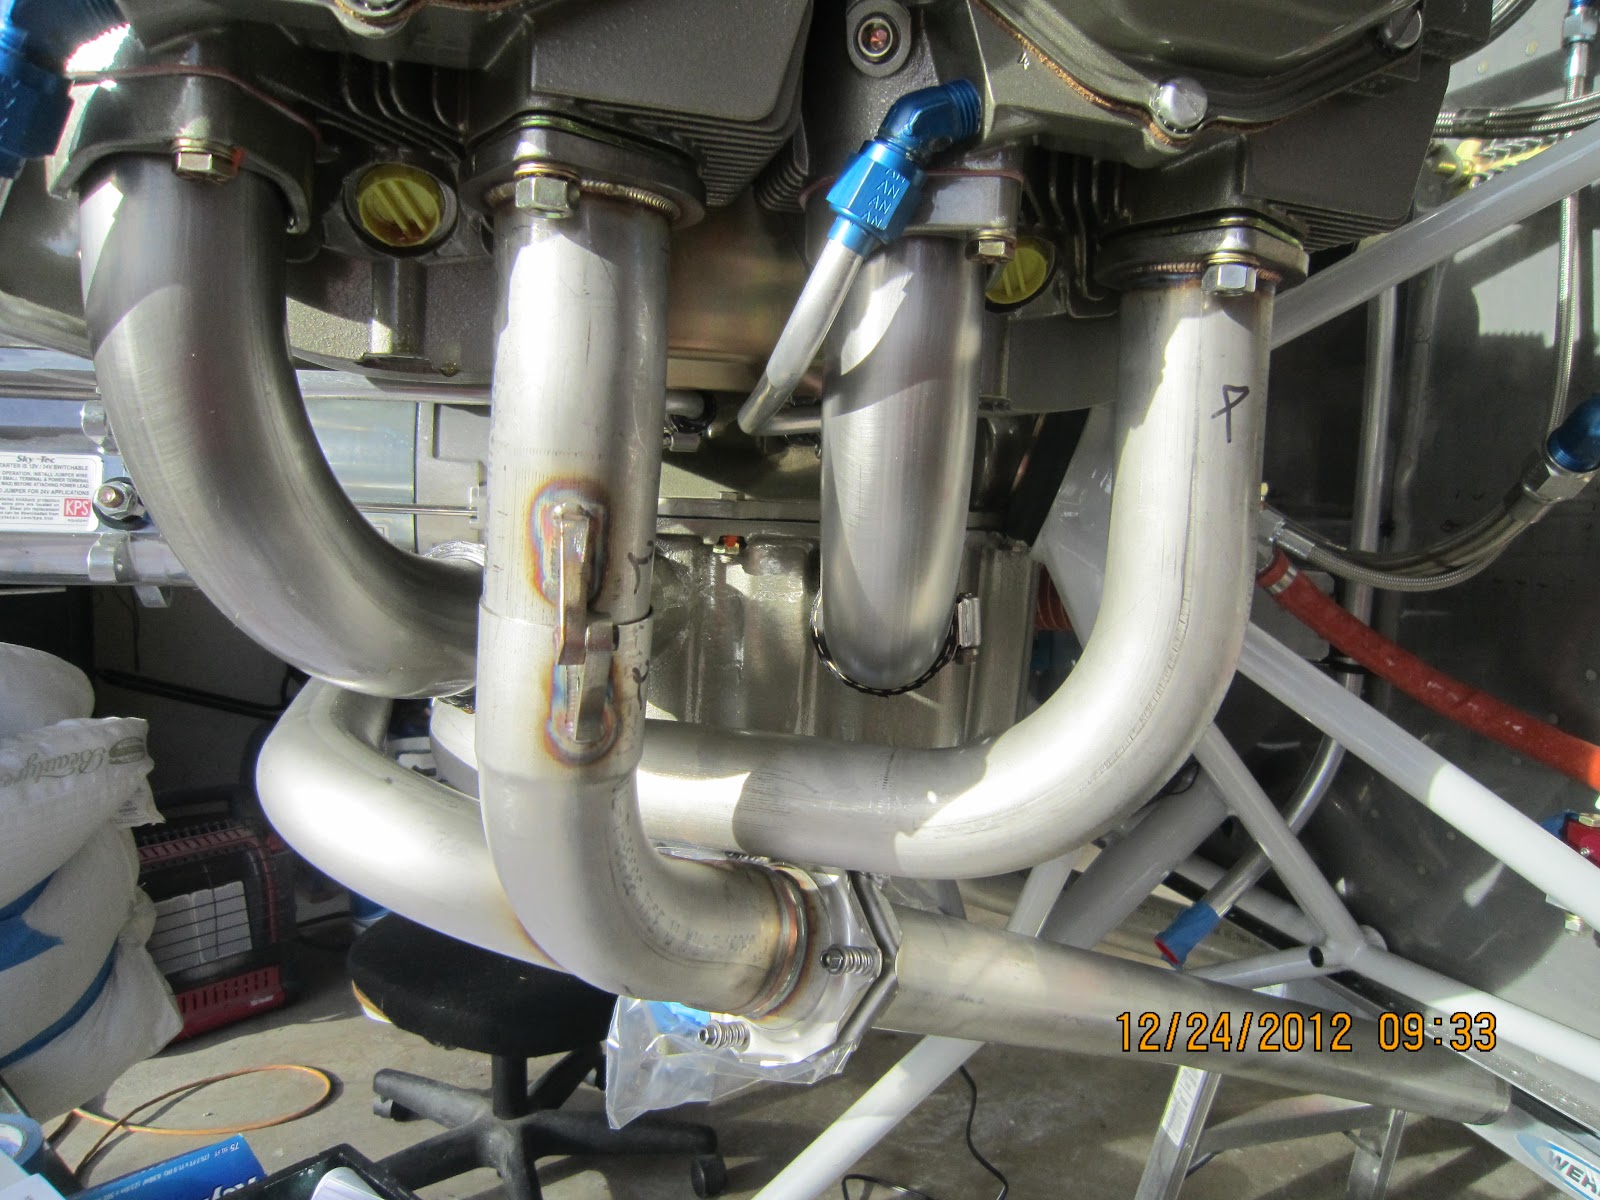
And the exhaust system. We're not planning on mufflers so we'll be nice and loud!

Here's the "forest of tabs" grounding system. The firewall has 1/4 inch faston tabs for any grounding needs plus a brass bolt that is connected to both the negative terminal of the battery and the engine block.
The inside has 48 tabs for all the grounding I'll need.
Labels:
08-Engine
Monday, December 17, 2012
Starting On Avionics
I've been without a camera as Austin took it after his graduation for some night photos with Kim while the tower was burnt orange. I took these with an iPad. I installed the VP-X Pro and put it in a large ziplock to keep any aluminum shavings or dust out.

Here's the engine monitor mounted temporarily. I added some angle to the left rib to match the center rib. The center rib has extra angle because it will attach to the canopy roll bar. I can now use it to mount a couple of devices that are easily accessible from below after the top skin is riveted.
The radio stack is very solid after I used some angle to attach it to the subpanel.

Here's the engine monitor mounted temporarily. I added some angle to the left rib to match the center rib. The center rib has extra angle because it will attach to the canopy roll bar. I can now use it to mount a couple of devices that are easily accessible from below after the top skin is riveted.
Labels:
09-Panel
Saturday, December 8, 2012
Radio Stack Mounted
The radio stack was easier than I thought. I set the face of the audio panel and GPS back 1/4 inch to make it a little more flush like the Skyviews. I had to cut the subpanel but I had planned on that and measured twice before I cut. I still need to clean up the edges and make a bracket on the subpanel to anchor everything but I really like how it looks. The tops line up exactly and there's space below the Garmin for a yet-to-be-released Dynon autopilot control head.
Here are the rough cuts in the subpanel.
Labels:
09-Panel
Wednesday, December 5, 2012
Started Radio Stack
I finished cutting the opening for the radio stack and you can see the racks being test fit. Next, I'll add the angle and supports. I'll have to cut into the subpanel because of the 430W length but that was the plan. I want to make the panel relatively easy to remove so the subpanel bracket supports will take some planning. This is when I wish I had a small bending brake.
Labels:
09-Panel
Monday, December 3, 2012
Skyviews Installed
I cut the panel for both Skyview displays. Six screws on the perimeter with platenuts behind the panel plus the shallow depth make for an easy install. If I need to service something behind the panel, it will be easy to remove the displays and reach through the big hole. Better than lying on my back on the floor. Next, I'll work on the smaller hole between the displays which will hold the radio stack with the PAR100EX audio panel and the Garmin 430W Nav/Com/GPS.
Labels:
09-Panel
Subscribe to:
Comments (Atom)


