

Monday, July 19, 2010
Fuel Sender Ready
I finished the fuel sender and temporarily installed it on the fuel access plate. Paula came out and helped me check the electrics of the gauge by moving the float up and down while I used a multi-meter to check the resistance. The only thing left before finishing the tank with the baffle is the fuel pickup. I need a 3/8's tube bender for that job and I've ordered one from Aircraft Spruce that I'll pick up at Oshkosh to save the shipping cost.

Thursday, July 15, 2010
Semco Sealant Gun
Here's my new (used) Semco sealant gun. It's a Model 250-B. The Model 250-A is the same except it has a handle and trigger instead of the flat paddle trigger like in the photo below. I tried both and much prefer the paddle trigger. I can get into much tighter places like the fuel tank when sealing the ribs when using the paddle trigger. The tubes also come in several sizes. I've used both the 2.5" and the 6" and prefer the smaller for inside the tank work. I didn't see any use for the 12" unless you're building a 747. It uses pneumatic pressure to push out the sealant in a very controlled manner with the ability to stop the flow instantly. It was much easier to encapsulate the rivet shop heads with it instead of scooping and dabbing with a popsicle stick. I also wet sealed every rivet by putting a tiny dab in each countersunk hole before putting the rivet in and the Semco gun made it fast and clean as it doesn't continue to flow when you let up on the paddle or trigger. You do have to fill the plastic tube (goes inside the metal housing) with your sealant but that wasn't too hard. I told Paula that this would make a great cake or cookie decorating tool...just use icing instead of proseal! Edit: I tried icing a cake with it and it worked fine but the nozzle was too plain to make fancy designs like the dedicated decorating tips.
I purchased several on ebay for such a good deal that I gave some as gifts. If you're shopping for used, make sure you get the factory air line as the fittings look hard to source. I got extra plastic tubes and nozzles from Brown Tool. I ordered 6 or 8 different nozzles and the only two I like are the straight 4" and 2.5" with a 1/8 opening.
For cleanup, I unscrew the plastic nozzle and set it aside. I also pull the plunger out. Then I put a piece of scrap "handle" in the tube and use it to pull the old proseal out after it dries. I don't squeeze any leftover out as it makes it easier to remove almost all the dried proseal including from the nozzle. Leaving it overnight is just the right amount of time as it's rubber like but not too hard. Makes cleanup a breeze.
I've also used the Semco for applying RTV to seal the baffles. I got a caulk gun size container of red high temp RTV from NAPA for just a little more than a retail tube. It was easy to squirt it into the plastic Semco tube and it was much easier to apply in tight spaces. I left the RTV in the tube and it stays fresh and can be used again after pulling a small plug of dry RTV out of the tip.

Tuesday, July 13, 2010
Flew an RV-7A Again
I got to fly Norm's RV-7A yesterday for 1.5 hours and 8 landings. Felt great to get back into the air. Norm really did a great job helping me shake off some of the rust. I am really excited about how nice of an aircraft the RV-7 is and how fun it is to fly. Definitely good motivation to keep pounding those rivets (or prosealing those tanks).
Sunday, July 11, 2010
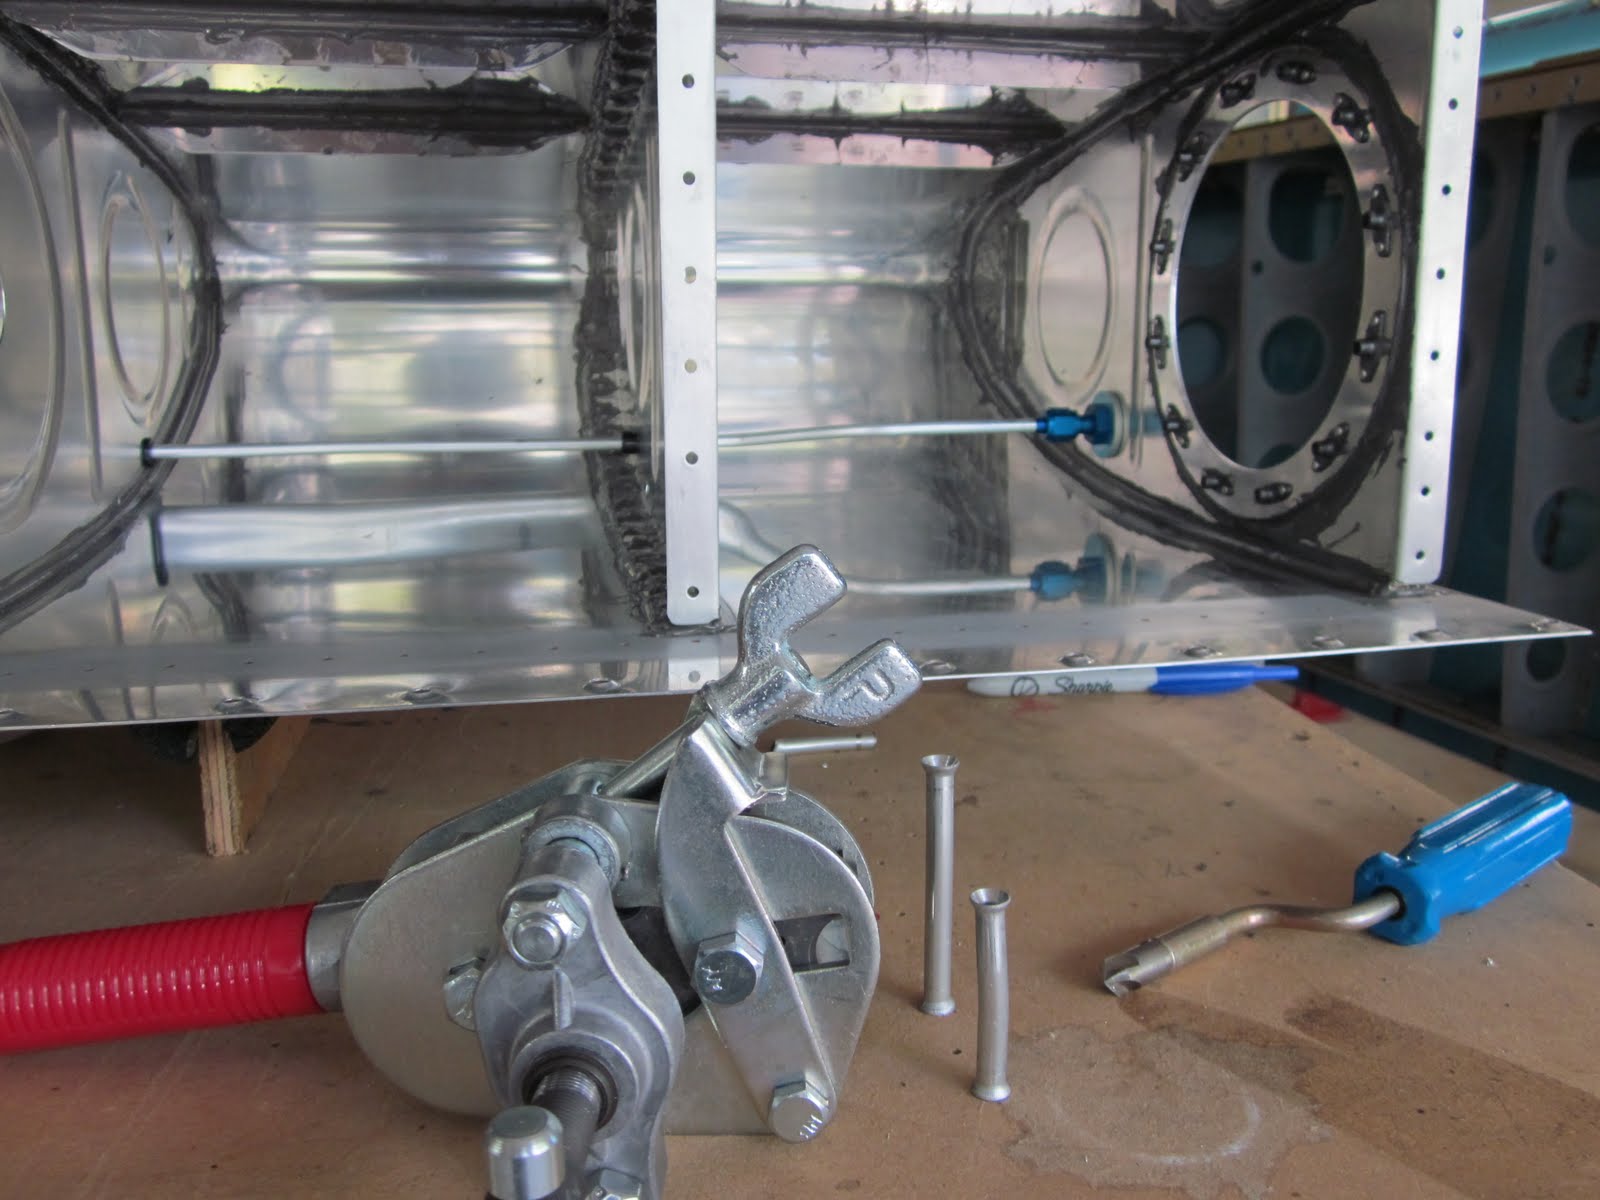
Fuel Tank Vent Line Installed
Here's the vent line installed in the right fuel tank. In front is my Parker Rolo-Flair tool for flaring the ends of aircraft tubing with a 37° flair. I practiced on several pieces of scrap tubing to make sure I had the technique down. Austin was home for Shelby's MBA graduation party and helped by drilling the hole for the AN fitting.
Here's the other end of the vent line at the highest point of the tank next to the fuel cap.

Here's the other end of the vent line at the highest point of the tank next to the fuel cap.
Monday, July 5, 2010
Finished Inner Ribs of Right Tank
I finished the 5 inner ribs of the right fuel tank. Don't tell Paula, but below is a picture of the tank IN THE LIVING ROOM! I sneaked it in to finish encapsulating the rivet shop heads with proseal while in the comfort of air conditioning.
My friend and RV mentor, Norm, came by today with his son Jeff to look at the project. He's packing up to move and all his tools and the RV-10 project are inaccessible so he said he'd like to come by as he's going through building withdrawals. I told him I was going to talk bad about him if he was willing to visit during proseal. It turned out to be really great for me as Jeff works on Boeings (KC-135) and uses proseal extensively. He said everything looked good and that he wasn't just saying that to be polite. Nice to have an outside opinion as it sometimes feels as if I'm working in a vacuum. Van's instructions are good but don't cover everything. I've read Rick G's method of fay sealing and watched the Orndorff video's but nothing substitutes for having a pro look everything over carefully.

My friend and RV mentor, Norm, came by today with his son Jeff to look at the project. He's packing up to move and all his tools and the RV-10 project are inaccessible so he said he'd like to come by as he's going through building withdrawals. I told him I was going to talk bad about him if he was willing to visit during proseal. It turned out to be really great for me as Jeff works on Boeings (KC-135) and uses proseal extensively. He said everything looked good and that he wasn't just saying that to be polite. Nice to have an outside opinion as it sometimes feels as if I'm working in a vacuum. Van's instructions are good but don't cover everything. I've read Rick G's method of fay sealing and watched the Orndorff video's but nothing substitutes for having a pro look everything over carefully.

Thursday, July 1, 2010
First Fuel Tank Rib Prosealed
Below, I'm buttering the flanges of the first Fuel Tank Rib with proseal. I'm going to go with the Rick G. method of fay sealing so I'll let this set up overnight and wet shoot the rivets tomorrow.


Here's the first Fuel Tank Rib installed with a nice fillet of proseal. I used a 12cc syringe I got from the farm and ranch store to get the proseal in the right place and a popsicle stick to do the fillet. Worked well but the next syringe will be bigger and I'll drill the opening a little.
Subscribe to:
Posts (Atom)

