
Here's an interesting video from a lecture given in the 50's by an MIT professor about aerodynamic drag and why it's important to have an airfoil shape when you're going fast. The RV series of aircraft are about 50 knots faster than the equivalent production aircraft with approximately the same size motor and weight due to careful drag reduction. Don't you just love youtube?
Tuesday, December 21, 2010
Monday, December 20, 2010
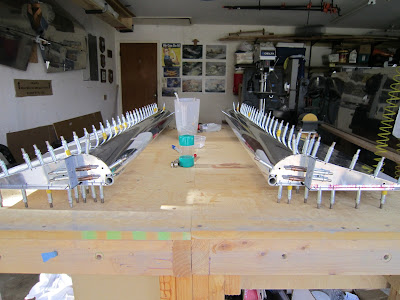
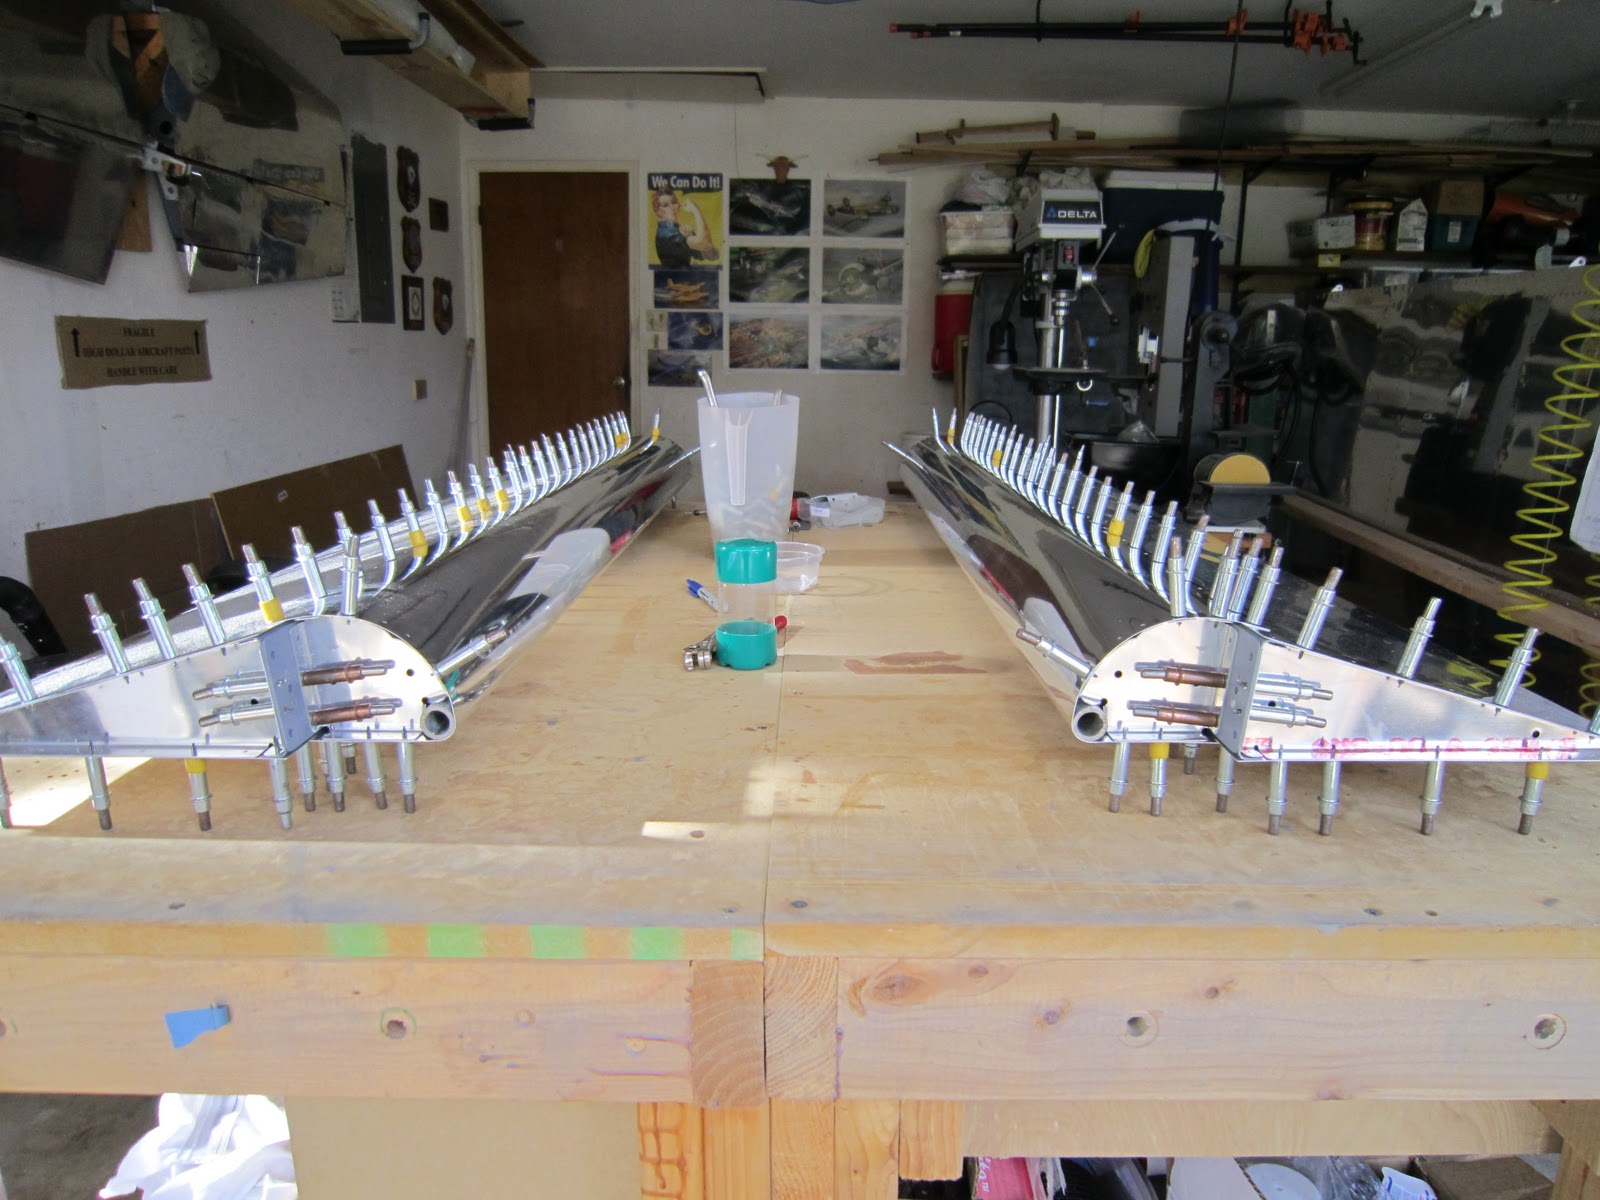
Pitot Line And Pushrods Installed
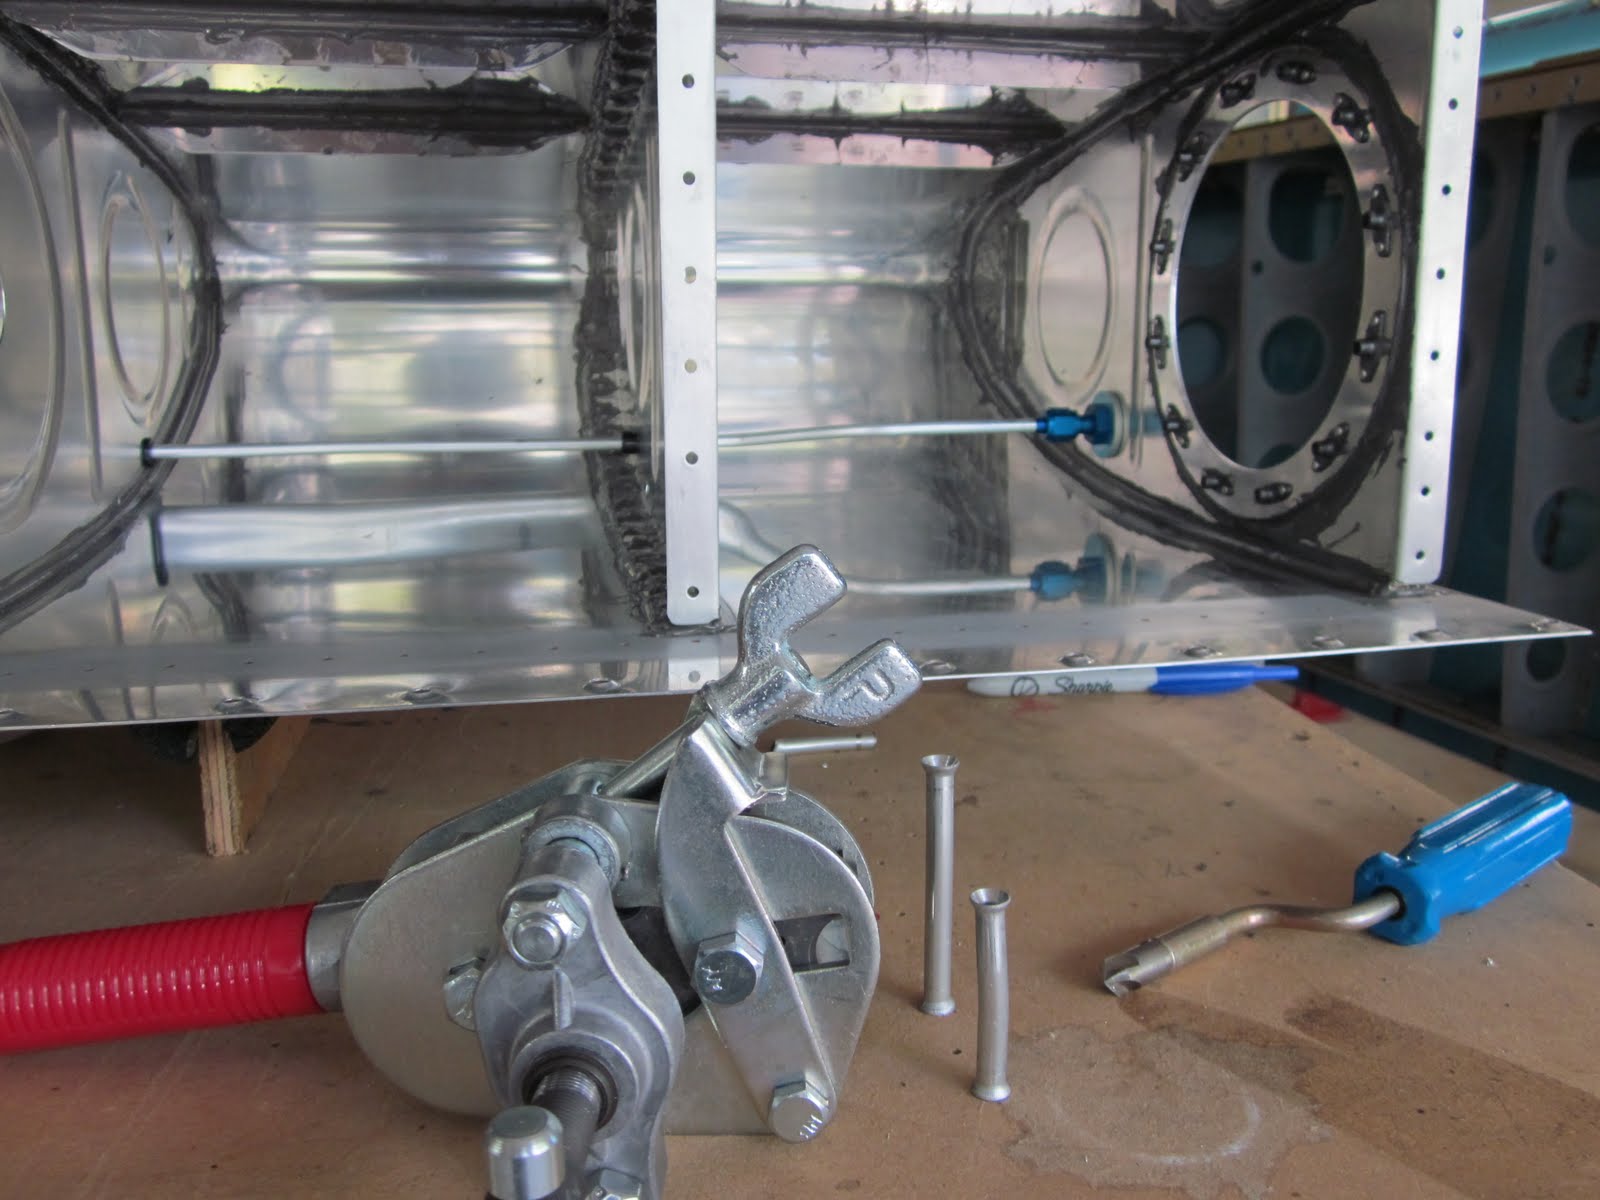
Got the pitot line installed which will connect to the pitot tube. It measures how much pressure is being pushed in the front of the tube and compares it to the static pressure in free air on the side of the aircraft. The calibrated difference outputs to the airspeed indicator while the static pressure outputs to the altimeter and vertical speed indicator. If you didn't recognize it immediately, it's the curved tube with the big blue nut at the bottom of the picture below.
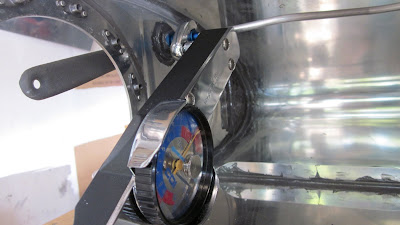
You can also see the bellcrank with the two pushrods attached. An elegantly simple system. The larger pushrod connects to the bottom of the stick in the cockpit. The smaller one which is going up in this picture (aft when the wing is level and not held in a jig) attaches to the aileron.

You can also see the bellcrank with the two pushrods attached. An elegantly simple system. The larger pushrod connects to the bottom of the stick in the cockpit. The smaller one which is going up in this picture (aft when the wing is level and not held in a jig) attaches to the aileron.

Here's a youtube video with a lesson on pitot static systems.
Thursday, December 16, 2010
Left Aileron Mounted
Here, Austin and I have mounted the left aileron. Yup, lots of fingerprints. It had to come on and off multiple times to get the spacers and washers just right. It was a near perfect fit. We only had to add one "L" or thin washer beyond what the plans show which was not bad as the instructions said to add washers or make spacers as required.


Tuesday, December 14, 2010
Started On Aileron Installation
I decided to install the ailerons first and then check the flap hinges for spacing before drilling them. I didn't want to order a new hinge if the spacing wasn't correct plus all the trouble of drilling out rivets, etc. Below, I've finished one of the aileron to stick pushrods. These will connect to the bottom of the stick in the cockpit and then through the wings to the bellcranks in each wing which will then connect to pushrods which will control the ailerons. Kind of like Dem Bones: the kneebone's connected to the thigh bone.... Be sure and click on the link and wait for the music and scroll down a little to watch the skeleton dance. Funny!


I added padded magnetic jaw pads to my vise. I had to ream out a brass bushing for the bellcrank and it was much easier with these plus little chance of crushing the soft tubing. I used them on the pushrods above as well. After having used the bench vise for just a couple of days, I now consider it a tool necessity!

Tuesday, December 7, 2010
New Vise Plus Work On Flaps
Here's a picture of my new bench vise with the flaps in the background. I've been trying to find a good vise at a reasonable price on craigslist or ebay for about 6 months with no luck. The flaps require a bend on two pieces of thick aluminum and a vise like this one will make it much easier. This was the only one left at Home Depot that was Wilton brand and it was only $21! It was made in China but under specs for Wilton so I'm hoping the quality is a little better that the usual China junk. The old bullet style Wiltons on ebay go for hundreds. I made this one detachable by epoxying nuts into the bench. The white stuff below the vise on the edge of the bench is the epoxy with the nuts inside.
I'm making slow but steady progress on the flaps. Part of what's holding me up is understanding how to attach the flap hinge. The written plans say to attach one half of the hinge to the flaps now but the plans have a note to move both sides of the hinge forward or aft to align the flaps with the ailerons. Sort of a Catch 22 thing. The RV forum wasn't real clear, either. Hmmm?


I'm making slow but steady progress on the flaps. Part of what's holding me up is understanding how to attach the flap hinge. The written plans say to attach one half of the hinge to the flaps now but the plans have a note to move both sides of the hinge forward or aft to align the flaps with the ailerons. Sort of a Catch 22 thing. The RV forum wasn't real clear, either. Hmmm?


Monday, November 22, 2010
Finished Both Ailerons
Here, I've finished both ailerons. What does that have to do with a penguin hat, you might ask? My daughter, Shelby, thought I should wear funny hats in in my pictures. This is my son's hat that he wears to Wurstfest. You can see the next hat in the background!


Wednesday, November 17, 2010
Finished Right Aileron
Here, I've finished the right aileron. You might ask yourself, "self, why is he wearing a cheesehead?". It's not some subtle homage to the home of the EAA and Airventure in Wisconsin (which produces 25% of all the cheese made in the United States). It's simply that Shelby said it would look funny if I wore a cheesehead in one of my pictures. Oh, and the aileron turned out great. I'm really looking forward to checking out the flying characteristics of the superbly folded trailing edge.


Tuesday, November 16, 2010
Red Green - How To Build Your Own Airplane
I wasn't sure how to build this air-o-plane thing so I got this book.
Monday, November 15, 2010
Riveting Ailerons
Here, I'm final riveting the right aileron. I'm using the old fuel tank/leading edge cradle to help hold open the bottom of the aileron so I can get to the top rivets.


Friday, November 12, 2010
Ailerons Ready To Final Drill
I took Veteran's Day off as I am a veteran and got a lot of work done on the ailerons. I had planned on working half a day on the plane and the rest in the yard but it was a little rainy so I couldn't do the yard. No problem, I'll just keep working on the ailerons!


They're both ready for final drilling and then the usual deburring, dimpling, priming and then reassembly for final riveting. The only thing new in this go-around is the counterbalance. It's a galvanized water pipe that needs to be drilled and countersunk. You can see it in the picture above on the far left. OK, I know you're thinking to yourself, "self, what's with this cheesy water pipe thing". It just happens to be the perfect weight for a counterbalance since the controls are all balanced (which is a really top quality thing) and it's simple and weather proof. And, it's smoothly cut to within 1/64th of the nose skin. Now that's quality control especially since it's just a water pipe. If you really want to read more about aileron balance weights, the link takes you to a wikipedia article about them. Right below balance weights is a section on Frise ailerons, which is what you're looking at in these pictures.
Thursday, November 11, 2010
Folding Aileron Trailing Edge
The folding of the aileron trailing edges came out really well. Below, I'm checking that the skin is straight all the way back to where the radius starts. It is.


Monday, November 8, 2010
Back Rivet Plate
Here's my inset back rivet plate. It's 3/4 inch thick plate steel and 9"x15". It's flush with the top of my workbench surface and I leave it in place all the time. I beefed up the frame and added screws to level it. I got it smooth by starting with a belt sander with 80 grit and working my way up to about 320 grit on a palm sander. I protect it with Boeshield. I've had it in my workbench since I began building but I never had a picture of it to show others.


Finished Aileron Stiffeners
This is another example of where my best work will never be seen. The aileron stiffeners will be totally enclosed when the ailerons are finished. No one but me will know that every stiffener was carefully match drilled with every hole and edge deburred to remove any stress risers. All 32 of the stiffeners were marked for location and all the mating surfaces were cleaned and primed. You can see the beautifully flush rivets on the outside but you can't see all the carefully measured shop heads of the rivets on the inside. Oh well...at least I know.
Paula helped put the rivets in the holes and covered them with rivet tape and then taped the stiffeners in place...all the while watching football with me. Cowboys got whipped 45-7 by Green Bay. She said she should be nominated for the best wife ever. You are hereby nominated but you have to read this to find out.

Paula helped put the rivets in the holes and covered them with rivet tape and then taped the stiffeners in place...all the while watching football with me. Cowboys got whipped 45-7 by Green Bay. She said she should be nominated for the best wife ever. You are hereby nominated but you have to read this to find out.

Saturday, November 6, 2010
Started Work On Ailerons
Here are the stiffeners for the inside of the ailerons. 32 in all, 16 for each aileron with 8 each on the top and bottom skins. The repetitive tasks are sometimes the hardest as you do the same thing over and over and over...


Plans page for the ailerons. Getting much easier as I get more practice reading them.

Friday, November 5, 2010
Finished Aileron Gap Seals and Flap Braces
Below, I've finished the aileron gap seals and flap braces and now it's time to move on to the ailerons and flaps themselves.


The bottom skins will go on after everything has gone into the wing body like the pitot tube, the wiring and the flight control parts. Nice to finish a minor milestone.

Wednesday, October 27, 2010
Aileron Hinge Brackets
Started work on the aileron hinge brackets. Here's the outboard one on the left wing. The ailerons attach to the aft of the wing and pivot on these brackets.

Tuesday, October 26, 2010
Finished Top Wing Skins
All the top wing skins are finished. Austin came home on Saturday and we finished the last top wing skin lickety-split. Sure helps having someone to help and especially someone good with building! Austin and I removed the right wing and flipped the brackets on the stand and reinstalled it leading edge down so we can work on the flaps and ailerons easier plus have better access to the inside of the wing. Nephew Spencer came by on Sunday and we flipped the left wing. I also installed a 2x4 bumper guard outside the right wing that's next to Paula's car. That's all I'll say about that.


Tuesday, October 5, 2010
Working on Left Wing Skins
I'm starting to rivet the left outboard top wing skin. I've found that my arms are long enough that I can get to almost all of the rivets from below by lying on a low platform and reaching around to both sides at the same time. I may need help on the top row but at least I'll get most of them.


Saturday, October 2, 2010
Finished Left Inboard Top Wing Skin
Here, Spencer and I are riveting the left inboard top wing skin. Spencer did a good job riveting and the wing skin looks great. We had a good rhythm going where he'd put the rivet in the hole and cover it with the rivet set and call "ON" and I'd get the bucking bar on the tail of the rivet and call "GO". We make a good team. Don't know about the camera person commentary, though. Edit: OK, the camera person can make silly commentary. She's got a garage pass as she (Paula) came out and helped me finish the last of the hard to reach rivets on Sunday night after Desperate Housewives. Much appreciated.
Tuesday, September 28, 2010
Finished Right Leading Edge
Below, I've finished the right wing leading edge and permanently attached it to the wing spar. It went fast having just completed the left one plus there is no stall warner or pitot tube to worry about in the right wing. Not that I was worried...just since the right wing doesn't have them, nothing to worry about...although, I did worry a little bit on the left wing...but only the good kind of worry that makes you concentrate and do a good job...but nothing to worry about in the right wing since it's stall warner and pitot free. After my tight access experience riveting the left wing, I got Paula to help with the most difficult rib to spar riveting . She actually did great and taught me something. She didn't grip the bucking bar very tightly which worked better. I think I have been holding it too tightly to the shop head side of rivets. On the ones I could reach, I eased up on my grip and sure enough, better rivets. Thanks, Paula!


Thursday, September 23, 2010
Tight Access vs. Big Hands
In my previous post, I mentioned the tight access through the lightning hole while riveting the leading edge ribs to the spar. It got me thinking last night about limited access in general. I'm hoping that that was the worst of it although I still have the right wing to go. The picture below shows what I had to do to get my hand through the lightning hole. I'm not complaining about this minor scrape (or the matching one on my thumb) as that's to be expected when working with machines. I am worried that if there are any access openings just slightly smaller my hands will never fit.


Wednesday, September 22, 2010
Finished Left Leading Edge
Here's the left leading edge finished and permanently riveted to the spar (actually, just a couple of perimeter rivets left but they're easy and fast). The tank is also attached but only with bolts and screws every other hole per the directions. Must have to remove it later for something. Everything fits and looks great. Riveting the leading edge was much easier than the tanks because there wasn't any proseal. The hardest part was riveting the internal ribs to the spar. I had to reach up through lightning holes in the spar to hold the bucking bar but my hands were a size too large to easily fit through the holes. It was difficult enough that once I got my left hand through, I left it there and did everything else with just my right hand...and knees...and mouth...you get the idea.


Tuesday, September 7, 2010
Second Tank Finished and Leak Free
I have been steadily working on the plane but time has been a little harder to come by and given a choice, I'd rather build than blog. Below, I've finished the second tank and I just need to wait to let it dry before leak testing. This tank went much faster and using the Semco sealant gun made it much easier. The first tank took about 3 months to finish and the second tank took about 3 weeks! The wood cradles on top of the tanks are only there as a place to store them. Update: The tank tests leak free! I went through 2 bottles of soapy water going over the pressurized tank three times and no leaks were found.


Wednesday, August 11, 2010
Fuel Tank Passes Leak Test with Flying Colors
Well how about that. My first tank tested leak free! Below, I used the liquid column manometer method to measure the pressurization in the tank. I added 1 psi which is about a 27" difference in the water level (dyed green) in the looped clear tubing. Then, I carefully sprayed every rivet, screw or potential leak point with soapy water to look for leaks. NONE! Now it's on to the left tank. Like most things in life, it should be much easier the second time around.


Monday, August 9, 2010
Powered Scotch Brite Scuffing
Here's my new method of scotch brite scuffing. I used a shank from a disc cutoff wheel and put three rectangular scotch brite pads where the disc goes. Works great and is really fast.


Sunday, August 8, 2010
Finished Right Fuel Tank
I finished the right fuel tank and now the hardest part begins...waiting for proseal to dry so I can leak test.


Saturday, August 7, 2010
Finishing Right Fuel Tank
The right tank is getting close to finished. I made and installed the fuel pickup. I used my new Imperial tubing bender I picked up at Oshkosh from Aircraft Spruce. Worked great. The right tool makes all the difference.
Below, I'm getting the proper torque on the vent line fitting using my torque wrench and crowfoot wrench.
I also sealed the baffle. It's not easy getting a good bead on the inside of the tank at the baffle since there is no access once the baffle is in place. You have to carefully lay down a line of proseal on the inside of the tank skin and let the baffle "squeegee" it into place as you lower the baffle. Too much or too little and the bead won't form correctly. The Semco sealant gun made it easy to get a properly sized and placed line of proseal which resulted in a good bead like you see below. I shot this picture with the camera held inside the first bay through the tank access hole.

Below, I'm getting the proper torque on the vent line fitting using my torque wrench and crowfoot wrench.

I also sealed the baffle. It's not easy getting a good bead on the inside of the tank at the baffle since there is no access once the baffle is in place. You have to carefully lay down a line of proseal on the inside of the tank skin and let the baffle "squeegee" it into place as you lower the baffle. Too much or too little and the bead won't form correctly. The Semco sealant gun made it easy to get a properly sized and placed line of proseal which resulted in a good bead like you see below. I shot this picture with the camera held inside the first bay through the tank access hole.

Monday, July 19, 2010
Fuel Sender Ready
I finished the fuel sender and temporarily installed it on the fuel access plate. Paula came out and helped me check the electrics of the gauge by moving the float up and down while I used a multi-meter to check the resistance. The only thing left before finishing the tank with the baffle is the fuel pickup. I need a 3/8's tube bender for that job and I've ordered one from Aircraft Spruce that I'll pick up at Oshkosh to save the shipping cost.


Thursday, July 15, 2010
Semco Sealant Gun
Here's my new (used) Semco sealant gun. It's a Model 250-B. The Model 250-A is the same except it has a handle and trigger instead of the flat paddle trigger like in the photo below. I tried both and much prefer the paddle trigger. I can get into much tighter places like the fuel tank when sealing the ribs when using the paddle trigger. The tubes also come in several sizes. I've used both the 2.5" and the 6" and prefer the smaller for inside the tank work. I didn't see any use for the 12" unless you're building a 747. It uses pneumatic pressure to push out the sealant in a very controlled manner with the ability to stop the flow instantly. It was much easier to encapsulate the rivet shop heads with it instead of scooping and dabbing with a popsicle stick. I also wet sealed every rivet by putting a tiny dab in each countersunk hole before putting the rivet in and the Semco gun made it fast and clean as it doesn't continue to flow when you let up on the paddle or trigger. You do have to fill the plastic tube (goes inside the metal housing) with your sealant but that wasn't too hard. I told Paula that this would make a great cake or cookie decorating tool...just use icing instead of proseal! Edit: I tried icing a cake with it and it worked fine but the nozzle was too plain to make fancy designs like the dedicated decorating tips.
I purchased several on ebay for such a good deal that I gave some as gifts. If you're shopping for used, make sure you get the factory air line as the fittings look hard to source. I got extra plastic tubes and nozzles from Brown Tool. I ordered 6 or 8 different nozzles and the only two I like are the straight 4" and 2.5" with a 1/8 opening.
For cleanup, I unscrew the plastic nozzle and set it aside. I also pull the plunger out. Then I put a piece of scrap "handle" in the tube and use it to pull the old proseal out after it dries. I don't squeeze any leftover out as it makes it easier to remove almost all the dried proseal including from the nozzle. Leaving it overnight is just the right amount of time as it's rubber like but not too hard. Makes cleanup a breeze.
I've also used the Semco for applying RTV to seal the baffles. I got a caulk gun size container of red high temp RTV from NAPA for just a little more than a retail tube. It was easy to squirt it into the plastic Semco tube and it was much easier to apply in tight spaces. I left the RTV in the tube and it stays fresh and can be used again after pulling a small plug of dry RTV out of the tip.

Tuesday, July 13, 2010
Flew an RV-7A Again
I got to fly Norm's RV-7A yesterday for 1.5 hours and 8 landings. Felt great to get back into the air. Norm really did a great job helping me shake off some of the rust. I am really excited about how nice of an aircraft the RV-7 is and how fun it is to fly. Definitely good motivation to keep pounding those rivets (or prosealing those tanks).
Sunday, July 11, 2010
Fuel Tank Vent Line Installed
Here's the vent line installed in the right fuel tank. In front is my Parker Rolo-Flair tool for flaring the ends of aircraft tubing with a 37° flair. I practiced on several pieces of scrap tubing to make sure I had the technique down. Austin was home for Shelby's MBA graduation party and helped by drilling the hole for the AN fitting.
Here's the other end of the vent line at the highest point of the tank next to the fuel cap.

Here's the other end of the vent line at the highest point of the tank next to the fuel cap.
Monday, July 5, 2010
Finished Inner Ribs of Right Tank
I finished the 5 inner ribs of the right fuel tank. Don't tell Paula, but below is a picture of the tank IN THE LIVING ROOM! I sneaked it in to finish encapsulating the rivet shop heads with proseal while in the comfort of air conditioning.
My friend and RV mentor, Norm, came by today with his son Jeff to look at the project. He's packing up to move and all his tools and the RV-10 project are inaccessible so he said he'd like to come by as he's going through building withdrawals. I told him I was going to talk bad about him if he was willing to visit during proseal. It turned out to be really great for me as Jeff works on Boeings (KC-135) and uses proseal extensively. He said everything looked good and that he wasn't just saying that to be polite. Nice to have an outside opinion as it sometimes feels as if I'm working in a vacuum. Van's instructions are good but don't cover everything. I've read Rick G's method of fay sealing and watched the Orndorff video's but nothing substitutes for having a pro look everything over carefully.

My friend and RV mentor, Norm, came by today with his son Jeff to look at the project. He's packing up to move and all his tools and the RV-10 project are inaccessible so he said he'd like to come by as he's going through building withdrawals. I told him I was going to talk bad about him if he was willing to visit during proseal. It turned out to be really great for me as Jeff works on Boeings (KC-135) and uses proseal extensively. He said everything looked good and that he wasn't just saying that to be polite. Nice to have an outside opinion as it sometimes feels as if I'm working in a vacuum. Van's instructions are good but don't cover everything. I've read Rick G's method of fay sealing and watched the Orndorff video's but nothing substitutes for having a pro look everything over carefully.

Thursday, July 1, 2010
First Fuel Tank Rib Prosealed
Below, I'm buttering the flanges of the first Fuel Tank Rib with proseal. I'm going to go with the Rick G. method of fay sealing so I'll let this set up overnight and wet shoot the rivets tomorrow.


Here's the first Fuel Tank Rib installed with a nice fillet of proseal. I used a 12cc syringe I got from the farm and ranch store to get the proseal in the right place and a popsicle stick to do the fillet. Worked well but the next syringe will be bigger and I'll drill the opening a little.
Sunday, June 27, 2010
Prosealed Stiffeners to Fuel Tank
Austin and I prosealed the stiffeners to the inside of the right fuel tank today. The stiffeners go on the bottom of each tank to prevent the tank skin from sagging. Each tank holds 21 gallons so at about 6 lbs per gallon, that's 126 lbs the bottom of the tanks need to carry.
Apparently, proseal makes you crazy. It wasn't as bad as I thought it was going to be. It helped that we took all the precautions I'd read about over the last year including protective hand cream and two pair of gloves. Anytime the top layer glove got proseal on it, we'd replace it. We went through almost a box (100) of gloves between the two of us but we stayed clean. Early on, I thought a little proseal on a glove wouldn't be a problem but when I tried to pick up a little rivet, I'd get 5 stuck to the proseal so that's when we started replacing gloves with impunity.


Apparently, proseal makes you crazy. It wasn't as bad as I thought it was going to be. It helped that we took all the precautions I'd read about over the last year including protective hand cream and two pair of gloves. Anytime the top layer glove got proseal on it, we'd replace it. We went through almost a box (100) of gloves between the two of us but we stayed clean. Early on, I thought a little proseal on a glove wouldn't be a problem but when I tried to pick up a little rivet, I'd get 5 stuck to the proseal so that's when we started replacing gloves with impunity.

We applied proseal until we could say "there's no way in hell this is gonna' leak". We didn't actually say that...cursing isn't polite...we just wanted to to apply enough proseal so we could say it if we were in the mood for cussing, which we weren't because things went fine but we still reserve the right to cuss if needed some time in the future.

Here, I'm mixing the proseal on my new scale. It measures down to a tenth of a gram which helps when measuring small quantities. I plan on doing the fuel tank ribs one or two at a time so I'll only be using small amounts of proseal for each session. Glad Paula didn't see me mixing it on her nice dining room table.

Saturday, June 26, 2010
Redneck Air Conditioning Helps with Tank Dimpling
Austin came home today to help with the tanks as my late father's day present. He's standing in front of our "Redneck Air Conditioning" ice chest with a fan blowing over it. Actually worked well. Got the idea from a company that sells a Van's RV air conditioning system very similar to this.
My friend and RV mentor, Norm, came by today with his wife Carol for a little visit. He's working on an RV-10 and was interested in seeing and talking about my fuel tank progress. He's built an RV-7A and finished an RV-9A and said the tanks were a mess. He talked me into doing the fay sealing method of sealing the tanks and I extracted a promise from him of help if they leak.

My friend and RV mentor, Norm, came by today with his wife Carol for a little visit. He's working on an RV-10 and was interested in seeing and talking about my fuel tank progress. He's built an RV-7A and finished an RV-9A and said the tanks were a mess. He talked me into doing the fay sealing method of sealing the tanks and I extracted a promise from him of help if they leak.
Tuesday, June 22, 2010
Fuel Cap & Flange
Here's an inside the tank view of the fuel cap and flange. I finished match drilling and countersinking both flanges last night. Since the fuel tank is a wet wing type, the flange will be prosealed and riveted in place. The fuel cap that's sticking out of the flange below is similar to a plumber's pipe stopper where two plates with a flexible gasket between them are squeezed together to seal the hole. Just a lot higher quality. And, hi to Little Gail. You're welcome anytime.

Monday, June 14, 2010
Fuel Tank Access Plates
Below are the inboard ribs of the fuel tanks showing the backing plates and the holes I cut in the ribs with the hole cutter. Oh, the carnage...it was a noisy, messy job with the hole cutter (aka fly cutter) in the drill press. But, the holes did come out nice and neat and round. In the above right of the picture are the covers that close up the holes and hold the fuel level senders and fuel supply lines. Should be a quick job to finish up these and then it's on to the fuel caps and fuel drains.

Saturday, June 12, 2010
Oshkosh B'Gosh
I get to go to EAA AirVenture Oshkosh for the first time this year. Yippee! 10,000 visiting airplanes make Oshkosh the busiest airport in the world during "The World's Greatest Aviation Celebration". 2,500 showplanes, 500 forums, 100's of vendors, aviation museums, music by Chicago, Gary Sinise and the Lt. Dan Band and Asleep at the Wheel. I also get to go to a special reception for EAA Chapter Presidents. Free food and drinks...wouldn't miss it.
I do have a question or minor pet peeve about AirVenture. I couldn't find the words "experimental" or "homebuilt" on the professionally built home page linked above. The letters "EAA" stand for Experimental Aircraft Association. Are they afraid of the word Experimental? Inquiring minds want to know.
I'll be going with Dan, the husband of one of Paula's co-workers. He's got a similar aviation background. Paula said his wife was happy to have someone to sub for her as she's been many times.

Thursday, June 10, 2010
Tanks Almost Ready for Proseal
The fuel tanks are almost ready for proseal. I've gotten all the ribs and stiffeners and baffles for both tanks done and I've match drilled everything. The skins are countersunk for the baffles. I've finished the tank attach brackets and only need to open the ends for the fuel attach hardware and then deburr and dimple and then on to the black goop from hell. I still get a kick out of the the fact that the tank sealant (proseal) has no known solvent on the planet. Nothing melts this stuff...which is good considering it helps hold the fuel that keeps you aloft!
In the left side of the picture below, you can see the tank attach brackets that were fabricated out of a big hunk of aluminum angle. Both are shown but only the left one that's nested into the the nose flanges goes with this rib. I just had them together showing Paula how fun it is to fabricate stuff. She was thrilled.
In the left side of the picture below, you can see the tank attach brackets that were fabricated out of a big hunk of aluminum angle. Both are shown but only the left one that's nested into the the nose flanges goes with this rib. I just had them together showing Paula how fun it is to fabricate stuff. She was thrilled.

Here are the two tanks in their cradles. I'm building both tanks and wings at the same time so clecos are at a premium which is why the left one has no clothes tomatoes clecos. I ordered more from Vans when I ordered the proseal but I accidentally ordered 3/16's and not 3/32's. I returned them and I'm waiting to receive the correct size. I also planned a swap sale at our next EAA 958 meeting and put out the word that I'm looking for more (good) clecos. I will send a crisp one dollar bill to the first person to contact me and mention this post.

Sunday, May 30, 2010
Fluting Tank Ribs
I finally finished deburring the tank ribs and now it's time to bend the flanges to 90° and flute them so they will be straight and lay flat against the inside of the tank skins. Here's the stack of ribs (14) and the shop made flange straightener.

Monday, May 24, 2010
Flight Instructor Ratings CFI, CFII, MEI
Today, I got my Flight Instructor Ratings. Below is a cropped copy of my temporary certificate. The hard copy will come in the mail in a couple of weeks. Having past military flight instructor experience allowed me to get three instructor ratings, CFI, CFII (Instrument) and MEI (Multi-Engine) with a test and a records review. The FAA designated examiner was really nice and said he was happy that he could do something for those that served in the military. My Dad went with me and we had a nice dinner at Jason's Deli before meeting the examiner.
I'm not sure if I'll use the ratings but I couldn't pass up the chance to get them for a nominal cost. It's a brand new program that sounds too good to be true which means the FAA will probably be quick to cancel it. They are not cheap to get normally. The cost for all three ratings can easily run to five figures. I could use them to give instruction to family or even for a little part time weekend income. Anywho, I've got them now and I'll decide later what to do with them.

I'm not sure if I'll use the ratings but I couldn't pass up the chance to get them for a nominal cost. It's a brand new program that sounds too good to be true which means the FAA will probably be quick to cancel it. They are not cheap to get normally. The cost for all three ratings can easily run to five figures. I could use them to give instruction to family or even for a little part time weekend income. Anywho, I've got them now and I'll decide later what to do with them.

Sunday, May 23, 2010
On to the Fuel Tanks
Time to get started on the fuel tanks. The fuel tanks are the inboard leading edges of the wing, just really beafed-up and sealed with all the appropriate lines and vents. Here, I'm test fitting the tank skin to the baffle and the adjacent wing skins. The round hole in the skin is where the fuel cap will go.

Monday, May 17, 2010
RV-12 Field Trip
Here are a few pictures of EAA Chapter 958 at Chuck Woods' hanger looking at his RV-12 progress. He also has a beautiful RV-9A painted in stars and stripes.


Carol and Norm looking at the RV-12 with Chuck's RV-9A in the background. Now that's a good looking paint job! Norm, you've got an RV-7A, an RV-9A and you're building an RV-10. Are you considering an RV-12 now too?

Don and Ed deep in conversation. If you want to hear some really good flying stories and just have an enjoyable conversation, sit with Don and talk about the Waco.

Subscribe to:
Posts (Atom)

