Part of preparing for the first flight is making sure the fuel tanks and fuel lines are clear of any construction crud. While flushing the tanks and lines I calibrated the fuel gauges which required adding two gallons at a time to tell the computers how to accurately measure the fuel. I also checked the flow rate of the electric backup fuel pump. Here's one of the filters I used. I have a big stack of them and change them often.
Here's my temporary fuel shutoff valve that I used to fill the gas can for transfer and calibration. Not in the picture is my grounding wire to prevent static issues.
Tuesday, March 31, 2015
Monday, March 16, 2015
Engine Start
Ready for my first engine start. Well, actually, it's not the first. I started it last week but the timing was off which made it run rough. With some help from Gafford Aero, I corrected the minor timing problem and now it runs like a sewing machine. No leaks or runs and the only problem is an incorrect oil pressure sensor. Dynon is sending me the correct one so I'm using an external gauge for the oil pressure until it gets here.
Video of the engine start. The prop looks like spaghetti because of the video frame rate of an iphone matches the rpm or something technical like that. Don't worry, it's not melting.
Labels:
08-Engine
Sunday, March 1, 2015
Thursday, February 26, 2015
Final Assembly And Wing Walk
I haven't taken many pictures of the final assembly but I have gotten a bunch done since my last post. Most of the things left to finish are cosmetic. I also filled the engine with oil last night in preparation of the weight and balance weigh-in and the first engine start. This is a picture of the wing root fairing and the wing walk non-skid I recently installed.
Labels:
05-Wings
Tuesday, February 10, 2015
Wings Are Mounted
My brother-in-law Stephen came to the hanger today and helped me mount the wings. It only took us an hour and a half for both wings after I finished removing the floor pans. Thanks US!
Labels:
05-Wings
Monday, February 9, 2015
Move To Airport
We made the big move to the airport this weekend. Everything went just perfect except Austin's iphone got smashed by the step on the airplane when we were loading it onto the trailer. Here's a picture of the crew. Austin, Me, Dan, Guy, our helper Johnny in the front and Paula behind the camera. I definitely couldn't have done it without them!
Here's the ramp.
Here's how we secured it to the trailer.
The truck and trailer that Stephen and David loaned me. They were heavy duty enough to haul a tank so a little airplane was easy. Got lots of honks and waves.
Carefully unloading at the hanger. Jack's Tweetie Bird is waiting.
Shelby and Dave popping the Champagne. They surprised me at the hanger along with with Uncle Steve.
Tucked in the hanger.
Celebratory lunch at Wing Stop to feed my hungry helpers.
Here's the ramp.
Here's how we secured it to the trailer.
The truck and trailer that Stephen and David loaned me. They were heavy duty enough to haul a tank so a little airplane was easy. Got lots of honks and waves.
Carefully unloading at the hanger. Jack's Tweetie Bird is waiting.
Shelby and Dave popping the Champagne. They surprised me at the hanger along with with Uncle Steve.
Tucked in the hanger.
Celebratory lunch at Wing Stop to feed my hungry helpers.
Labels:
99-Other
Monday, February 2, 2015
Panel Labels Done
The panel is starting to look finished. There are a few small things left to clean up but I'm mostly done.
Labels:
09-Panel
Shelby's Birthday Present
Shelby came home on Saturday to help organize in the garage as a part of my birthday present. She also brought some St. Arnold's Root Beer - Yum! You can see some of the bins on the lower shelves that she brought and we organized. I've needed to sort the "junk" in my parts bucket for years. She also helped place the permanent N number we applied to the tail. Thanks Shelbs!
Labels:
02-Workshop
Thursday, January 29, 2015
Empennage Fairing
I'm working on the empennage fairing. Next time, I won't go to the trouble of making a one piece fairing. Too much work for not much in return. It fits well so I just need to prime and sand before painting.
Labels:
06-Fuselage
Tuesday, January 27, 2015
Brakes And Brake Lines
Austin was home for my birthday party and helped me repack the main wheel bearings and drill the axle shaft holes for the big cotter keys. I also fabricated and installed the brake lines between the fuselage and calipers. The green cushion (made from a pool noodle) is to keep me from bending the wheel pant bracket by catching my foot on it.
Labels:
06-Fuselage
Friday, January 23, 2015
Fifth Point Harness Installed
I installed the fifth point harness (also known as the crotch strap) last night. The hard part was taking out the trim and floorboards.
Here's the anchor connection. The Crow tab or tang is too long so you drill a hole above the existing one and everything fits fine.
Labels:
06-Fuselage
Thursday, January 22, 2015
Seat Belts and Interior Trim
I'm getting the interior fit and finished. Here are the Crow seat belts installed on the passenger side. I still need to fit the 5th point belt (crotch strap) but I tried them out last night while I was updating software and they're very comfortable.
Here are some of the baggage compartment panels and you can see where the shoulder harness anchors come through.
Here you can see the front cockpit and some of the side panels and carpet. Very comfy.
Here are some of the baggage compartment panels and you can see where the shoulder harness anchors come through.
Here you can see the front cockpit and some of the side panels and carpet. Very comfy.
Labels:
06-Fuselage
Sunday, January 18, 2015
First Labels
Here are my first labels on the fuel selector plate. I'm happy with the way they turned out so now it's on to the panel in the airplane.
Labels:
09-Panel
Friday, January 16, 2015
Monday, January 12, 2015
Started Panel Labels
I taped paper copies of the panel and switch labels to the panel to check for fit. Once I get everything the way I want it, I'll create them in the dry transfer kit I got for Christmas from my Dad.
Here's my proof sheet for labels. I might change a few items but this is close. The round ones will go on the face of the knobs. Everything below was created with Google Docs free online drawing program. The only graphic I imported was the USB symbol. Here's a link to the file: Panel Labels 2
Labels:
09-Panel
Sunday, January 11, 2015
Cowl Heat Barrier
Installed the cowl heat barrier. The exhaust is close to several spots on the lower cowl and this reflective material keeps it a little cooler.
Labels:
08-Engine
Finished Filtered Air Box
I finished the filtered air box (FAB) and all the connections. This shows the cable connections for carb heat.
Here's a bottom view showing the alternate air door. This should be the last major firewall forward or engine related work. I'll still need to go over everything to make sure it's secured and torqued and safety wired as needed.
Labels:
08-Engine
Tuesday, January 6, 2015
Alternate Air Door
This is the alternate air door. It's the almost round thing on the bottom of the air box with two screws. If anything clogs the normal intake or filter, you pull the knob in the cockpit that opens the door to let air in through the bottom bypassing the filter. I've finished almost all the construction of the air box and intake. I just need to do the final installation connecting cables and making it pretty by sanding and painting the front and inside of the snorkel.
Labels:
08-Engine
Friday, January 2, 2015
Carburetor Heat
This is the intake for carburetor heat on the air box. The lever that sticks up in the upper right of the photo will connect to a cable in the cockpit for activating it. Only riveting left to finish it.
Labels:
08-Engine
Sunday, December 28, 2014
Snorkel Epoxied
I attached a fine grained styrofoam plug between the back of the snorkel inlet and the filtered air box and used a round file to cut a smooth channel between the two. Then I fiberglassed the inside of the channel and inflated a balloon inside to keep its shape. After it dries, I'll reinforce the inside of the snorkel and trim it to fit.
Labels:
08-Engine
Saturday, December 27, 2014
Modified FAB
I decided to modify the filtered air box a little. To get the inlet of the FAB to match the cowl snorkel, I raised the front of the FAB about 1/2 inch. I cut a wedge from each side and then taped it where I wanted it to be. I heated and cooled it several times with the heat gun and then clamped it in place to prep for a fiberglass patch.
Labels:
08-Engine
Monday, December 22, 2014
FAB
The FAB is the filtered air box. It holds the air filter, carburetor heat and alternate air door and looks like an upside down air cleaner on a car. I'm about half way through constructing it. After it's through, I'll install it on the carburetor and then fabricate a fiberglass extension from the FAB to the back of the lower cowl snorkel.
Labels:
08-Engine
Monday, December 15, 2014
Friday, December 12, 2014
Exhaust Hung
I'm finishing hanging the exhaust. Just the cross strap to attach which is already fitted and built. This is another task that would be easy the second time because understanding what needs doing is the difficult part. The hand drawn instructions were vague at best. I also had to move some electrical to fit the right hanger strap. Below is the easy left side with not much in the way. It's the black hose with two clamps and stainless tubes sticking out both ends.
The top of the hangers attach to sump tank bolts with a tab.
This is the right side showing how crowded it is.
The top of the hangers attach to sump tank bolts with a tab.
This is the right side showing how crowded it is.
Labels:
08-Engine
Monday, December 8, 2014
Remaining Inventory
After searching for the little aluminum tube for the fuel pump overflow line, I decided to do an inventory of what's left to build. I'm making ZERO promises on when I'll be done but the pile was surprisingly small. The box in the picture has three cardboard boxes inside. Two boxes have parts that are completed and just need to be reinstalled. The small box in the upper right contains things left to build. There are some other things that aren't in the box that I'll need to complete before flying like brake lines and a few more. The empennage fairing and wingtips are fitted but need finishing. There's some interior trim and the seatbelts that need fitting. I also have to label the panel but the list is getting small. I'm not sure if I'll fit and install the wheel pants and gear leg fairings before flying as they're not recommended during engine break-in.
Labels:
07-Finish Kit
Fuel Pump Overflow Line
I installed the fuel pump overflow line this weekend. The hardest part was finding the little aluminum tube. Here's where it exits out the bottom of the fuselage.
This is where any overflow would exit the fuel pump.
Labels:
08-Engine
Tuesday, December 2, 2014
Homemade Tow Bar
Here's my homemade tow bar. I used it to move the airplane over to let Paula park in the garage. It's not pretty and made from an old crutch with bushings welded to scrap metal but works just fine.
Labels:
99-Other
Finished Engine Wiring
I wrapped up the engine wiring last night. I do have some very minor things left like sealing the firewall penetrations but I'd put the wiring part at 99% done. It was a more difficult job than I expected. Next time will be ten times faster as now I know the how and where part of the job. On the right side I used the black "snakeskin" wrap for chafe protection of wires.
On the left side I used white spiral wrap. I've seen both used on many aircraft and I'll see which one I like better after some use. I also spent a couple of hours inside under the panel finishing the connections from the engine and securing wires.
Labels:
08-Engine
Monday, December 1, 2014
Wings Moved To Hanger
Austin came home and helped me move the wings to the hanger in San Marcos. They look kind of lonely in the corner. Jack was nice enough to let me squeeze in with "Tweety Bird".
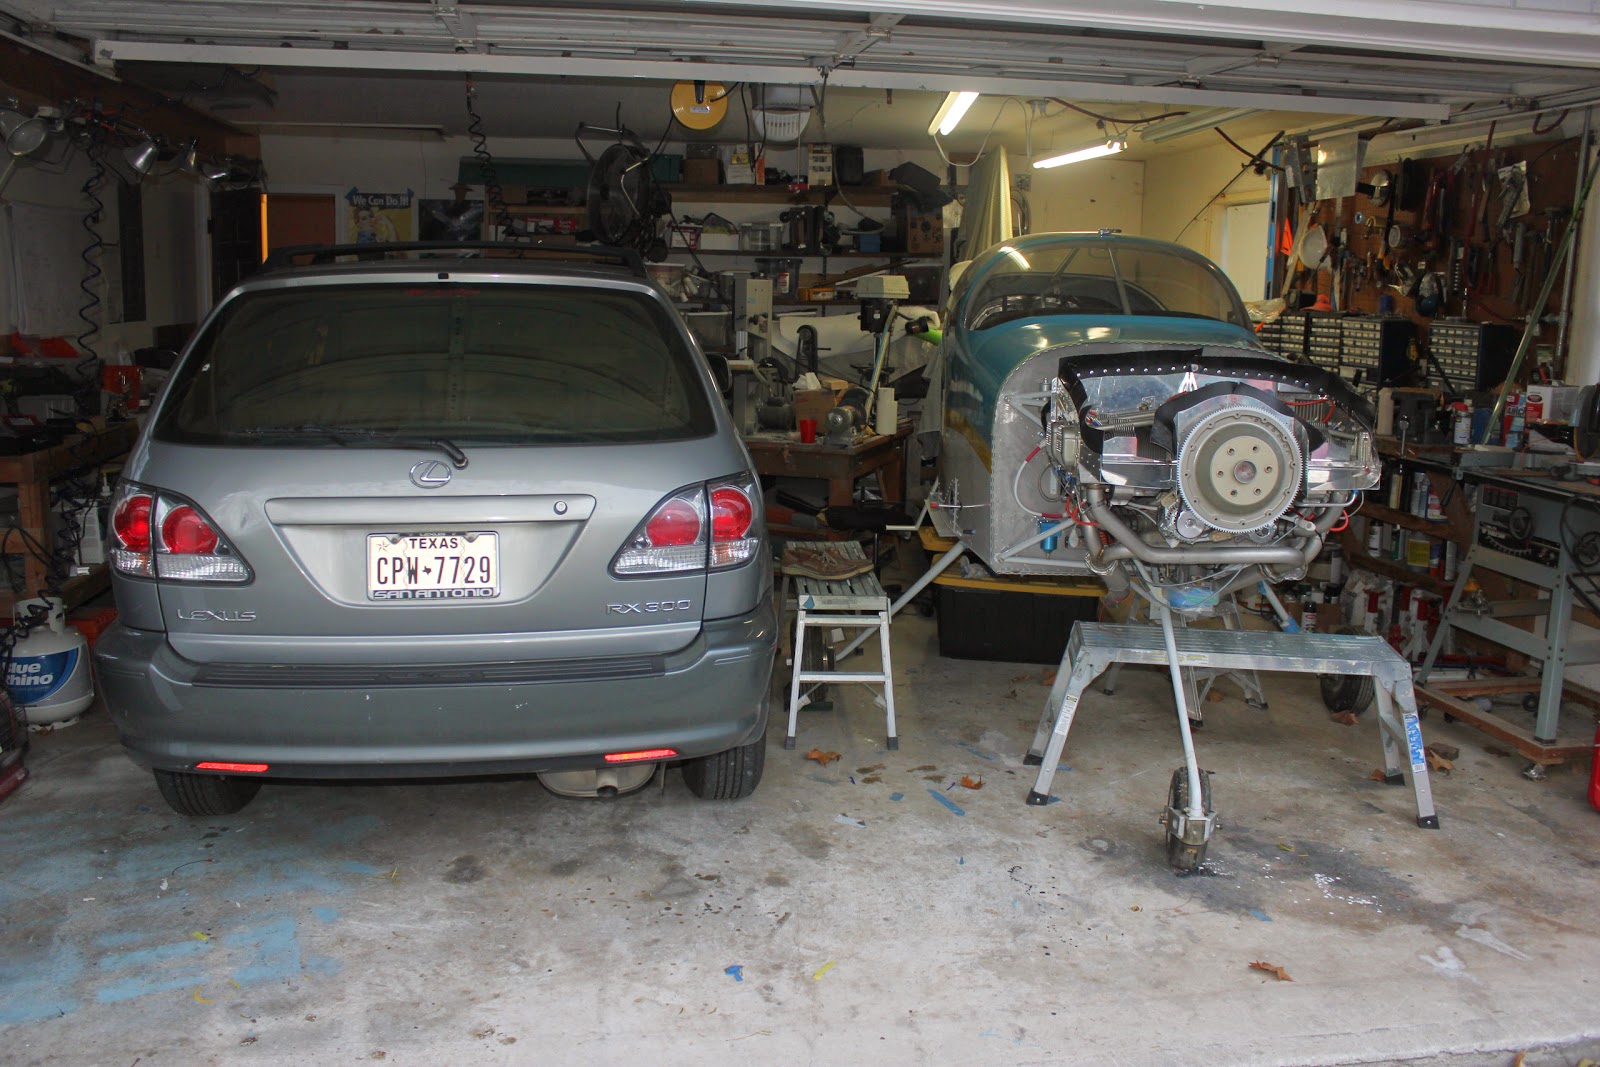
Paula's happy to have her car in the garage now that there's extra room.
Labels:
99-Other
Thursday, November 20, 2014
Oil Temperature Sensor
I had to call Aero Sport Power (the engine builders) to get advice about the Oil Temp Sensor as it didn't want to screw into the oil filter adaptor. Their advice was to remove the adaptor and chase the threads with a tap. Here's the picture of me doing it. That was the problem and all fixed and re-installed after a through cleaning.
Labels:
08-Engine
Monday, November 17, 2014
Manifold Pressure Sensor
I got the manifold pressure sensor installed this weekend along with a bunch of other firewall forward wiring. Here's the adaptor I used between the 1/8 line that comes through the firewall and the 1/4 line that goes into the sensor. It's from an oxygen line that my Dad used and fits perfectly on the sensor fitting. The connector between the two lines is from the aviation isle of an auto parts store in the vacuum line section.
Labels:
08-Engine
Monday, November 10, 2014
Engine Sensor Wiring
I'm almost done installing the engine sensors. Routing and attaching the sensor wires to the engine monitor harnesses will come next.
Labels:
08-Engine
Subscribe to:
Posts (Atom)